
Hello green beauties! Today I want to share with you my skin care routine. Getting rid of all the makeup, cleansing and pampering the skin is one of the most gratifying and relaxing thing to do at night. Taking good care of skin and body (as well as your mind and soul) is the first step to age well, as you know, we can’t avoid lines and other aging signs but we can do our best to make our skin face aging issues in the best shape.
I’m very strict when it comes to my skin care, I did not ever in my life skip this routine even if it’s super late and I use only natural, preferably, DIY ingredients.
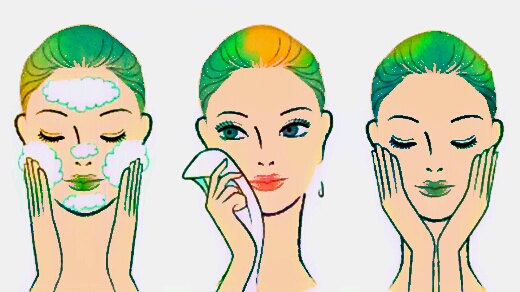
Step 1: Removing makeup and cleansing skin
Personally I did not wait till night to get rid of my makeup, this is a step that I like to do the very moment I head home from work to allow my skin to breathe free and to take as soon as I can a good dose of moisture.
My summer go to makeup remover unfortunately it is not my beloved DIY coconut makeup cleanser (have a look here for the recipe) because it’s to hot to make work the recipe as it should (in fact coconut melt in to oil form above 20 C) and at the moment there’s no way for the cleanser to remain in a solid (balmy) form. By-the-way, I still opt for an oily all-natural makeup remover mixing directly in my hand 2 parts of oil (any sort of organic vegetable oil will do) and 1 part of mild soap. Oil and soap mixed together forma nice jelly slippy cream that remove al the bulk of the makeup.
To get rid of eyeliner&mascara I use just a pump of oil. Oil breaks down even the hardest water-resistant makeup, it is a guaranty in therms of performance, plus it’s cheap (no need to use refined vegetable oil, what you got in your kitchen drawer it ok) and it nourish your lashed making them nice and strong.
After the oil method it is necessary to remove panda eyes and melt down foundation with some soap and water, using a face cloth or sponge helps to clean up easily al the residues. I finish of my cleasing routine with some apple cider vinegar toner ( your regular toner with a couple of tbs of ACV).
And voilà at this step my skin is nice and clean.

step 2: Exfoliation
This is step occurred from time to time in my routine if a need a deeper cleaning cleanser or if my complexion is grey and dull. Natural DIY scrubs are always the best, there’s no need to turn in to store-bought products since sugar, grounded coffee and salt are the best exfoliants on the market. If you are looking for a nice face and body scrub have a look at this recipe.
step 3: Hydration
Now it’s time to deeply restore the skin with some moisturazing products. I like to start with oil, but before that I spray on to the skin some toner or thermal water to allow oils to have a faster penetration in my epidermis.
Since my skin it’s a little bit spotty at the moment I opt for Nigelle oil (a.k.a black cumin oil. a.k.a black seed oil), this is THE Holy Grail oil for problematic skin, it’s a good emollient, plus its anti fugal and anti-bacterial proprieties keeps spots and bumps away. In my dry patches I like to use some drops of Argan oil, Avocado oil or a mix of Jojoba and Apricot kernel,all these oil have amazing hydrating proprieties and prevents age signs.I start using oil in my regular skin care routine a couple of years ago and I really feel that this has save my skin from severe dehydration and premature aging
After a good dose of natural oil I like to top up my hydrating program with serum and cream moisturizer. I know that it may seem a lot of greasy stuff on my face but my dry skin suck up everything.
After this last step my skin is nice and soft ready for a good night of sleep.
What about your night time routine…I courious to know..
J.
